Windows Virtual Desktop - How To
Remote Access - the Modern Way
Our company - as many others - decided to go full remote in the following days. It required some changes on our (IT) side, but not that much. We already supported this kind of work:
- Access to on-premises apps through Azure App proxy
- VPN to our sites
- Site2Site VPNs between our office sites
- most employees using laptops
We’ve decided to launch Windows Virtual Desktop (WVD) as a backup access for some of our employees. This way they can use a secure desktop that has access to our on-premises through VPN S2Site (between us and Azue).
All seemed easy. Just follow Microsoft Mechanics (part1, part2 and part3).
I’ll have to admit that MS Docs for this topic are really good.
And RT*M if you’re stuck!
Most tutorials shows a simple deployment within a demo tenant where you’re using global admin for everything. My case, and probably your’s too, is a bit different.
In this post I’ll assume you already have configured:
- Azure tenant
- on-premises AD synced with AAD using ADConnect
- proper licenses assigned to your users (Windows Virtual Desktop requries at least Windows E3 - link)
- VPN site to site to Azure
- a VM as a Domain Controller in Azure (or ADDS deployed)
- proper networking in Azure where your WVD VMs will be located
In our case we’ve decided to deploy a VM in Azure that will be a Domain Controller - in addition to our on-premises. This is a Standard B2s (2 vcpus, 4 GiB memory) VM which doesn’t cost much!
Step by Step
Let me briefly describe the whole process:
- Grant consent to Windows Virtual Desktop for Azure tenant
- Add RDS tenant to Azure tenant
- Create AzureApplication with proper permissions to manage WVD
- Deploy WVD through Azure marketplace
- Add users to those WVDs
- Guide users on using WVD (Web and RemoteApplication)
AFAIK, as of today (18.03.2020), there is no way to:
- grant users logon rights to those VMs using Azure Portal
- simple way to scale-out the environment
There are scripts on Microsoft Github but as the readme states:
This sample PowerShell script that can be used as a starting point for developing a solution to automatically scale a session host virtual machiness in Windows Virtual Desktop deployment.
It is not near any ‘easy’ solutions now. Hopefully we will get more from the Dev Team soon ![]()
Here are Docs that will help you setting auto-scaling.
For now - if you’d like to scale out - you can go through Azure Marketplace and deploy it again - with a changed number of hosts. It won’t destroy current solution. It will just add/remove VMs from the Host Pool. Then you can delete/deprovision those not needed.
For all this you will need following variables:
- Tenant ID
- Subscription ID
- WVD Tenant Name
- WVD Host Pool Name
- WVD VMs Prefix
- Azure AD Application DisplayName
- Resource Group Name
- AD account that has permissions to Add computer objects to specific OU
- Virtual Network and VM subnet where the VMs will be stored
Let’s start!
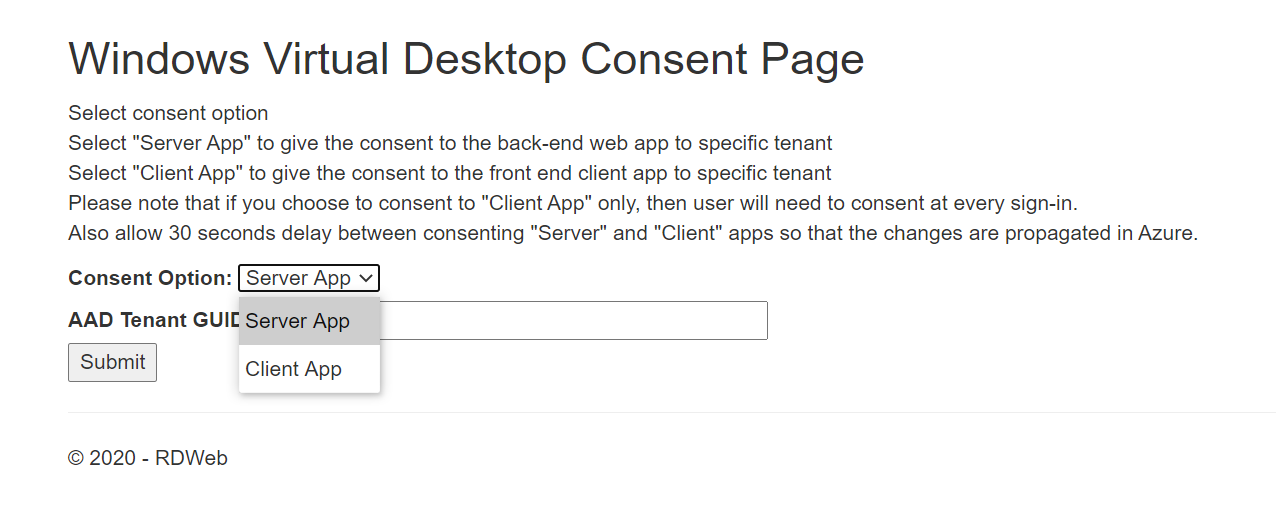
Grant consent to Windows Virtual Desktop for Azure tenant
This is simply done by visiting RDWeb site and providing your Tenant ID for both Consent Options - Server and Client
Add RDS tenant to Azure tenant
To add RDS to Azure tenant you will need Tenant ID and Subscription ID where that will be deployed.
You can either get it through Azure GUI or with PowerShell. Use your Azure Global Admin account to conenct to Azure:
Connect-AZAccount

#Select in which subscription you want to deploy your WVD. This will also give you the Tenant ID
$Subscription = Get-AzSubscription | Out-GridView -PassThru

Install-Module Microsoft.RDInfra.RDPowerShell
Import-Module Microsoft.RDInfra.RDPowerShell

Add-RDSAccount -DeploymentUrl https://rdbroker.wvd.microsoft.com

$WVDTenantName = 'WVD Pool 1'

New-RdsTenant -name $WVDTenantName -AadTenantId $Subscription.TenantId -AzureSubscriptionId $Subscription.Id
Create AzureApplication with proper permissions to manage WVD
Now we need to create Azure Application and grant permissions. For this we will use another Azure PowerShell Module ![]()
Import-Module AzureAD
$AzureADAppDisplayName = 'Windows Virtual Desktop Svc Principal'
$aadContext = Connect-AzureAD
$svcPrincipal = New-AzureADApplication -AvailableToOtherTenants $true -DisplayName $AzureADAppDisplayName
$svcPrincipalCreds = New-AzureADApplicationPasswordCredential -ObjectId $svcPrincipal.ObjectId
$AzureADApplication = @{
    Name = $AzureADAppDisplayName
    AppID = $svcPrincipal.AppId
    Password =$svcPrincipalCreds.Value
    TenantGuid =$aadContext.TenantId.Guid
}
#Output the information. Would be best to Export-CliXML if you do have PowerShell Logging enabled!
$AzureADApplication
I usually don’t do this for Azure AD Applications but…
Write down the password (in a Password Manager preferably)
You will need this identity every time you will want to redeploy the solution (scale out).
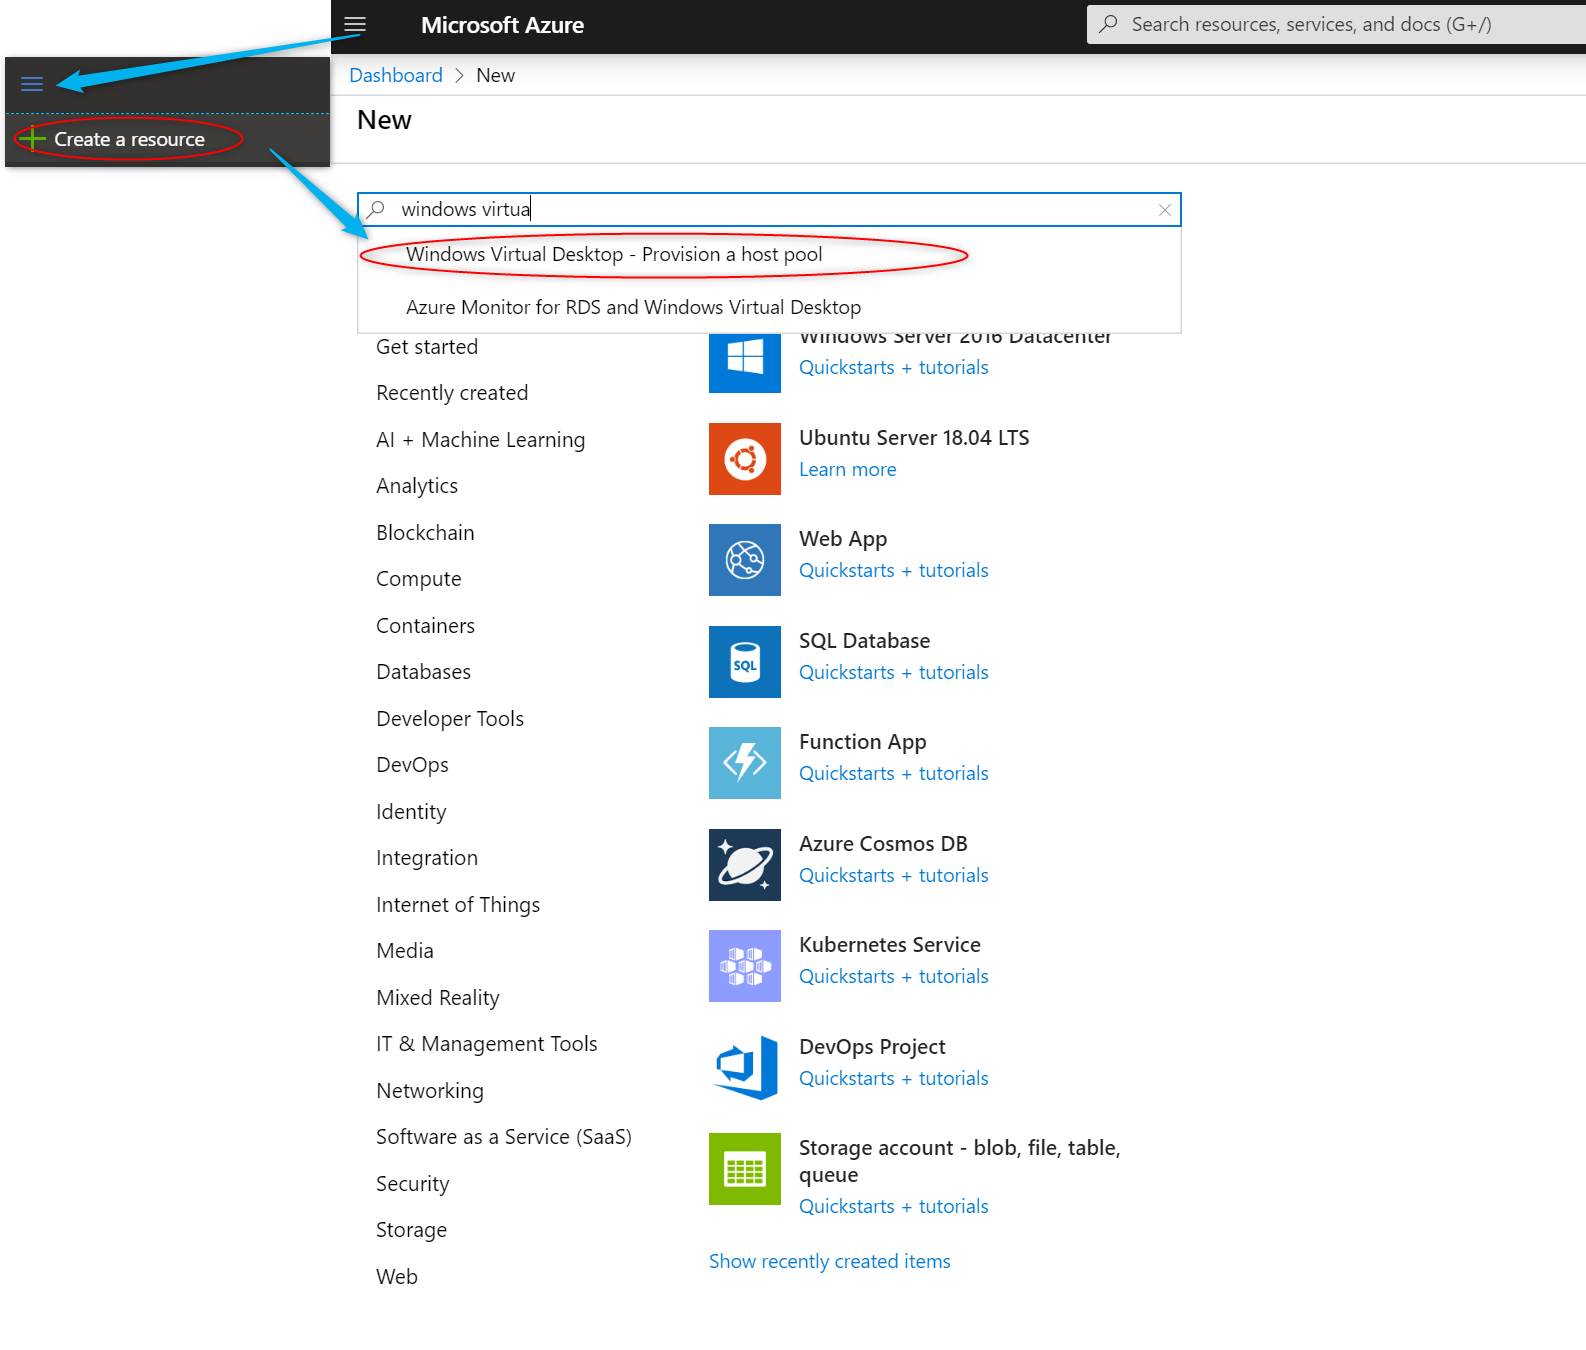
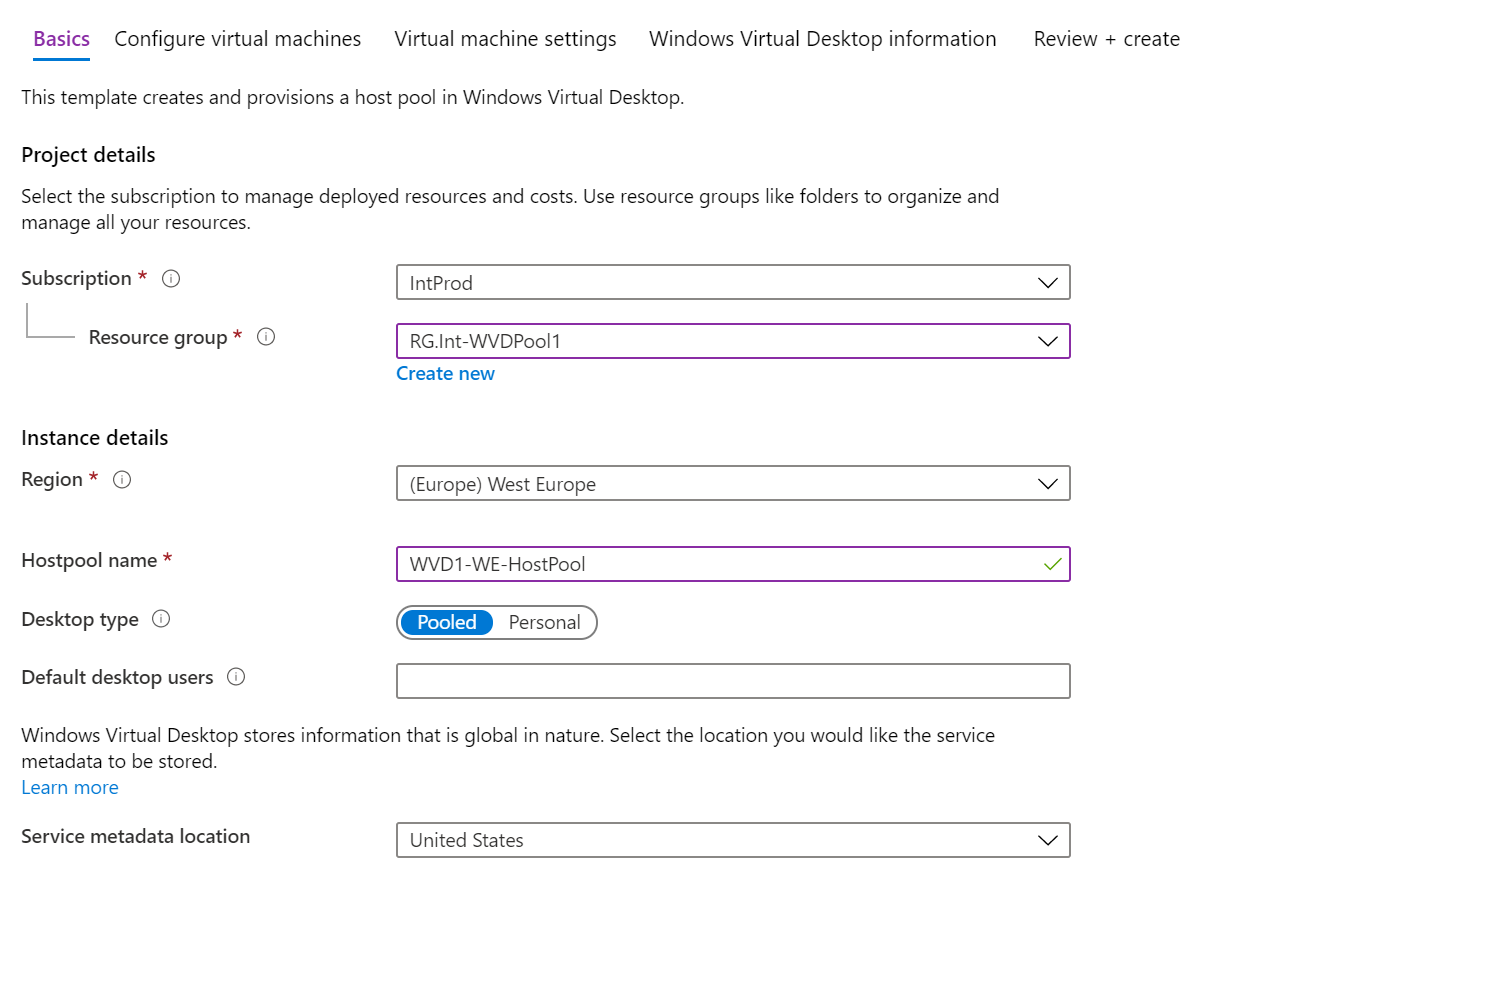
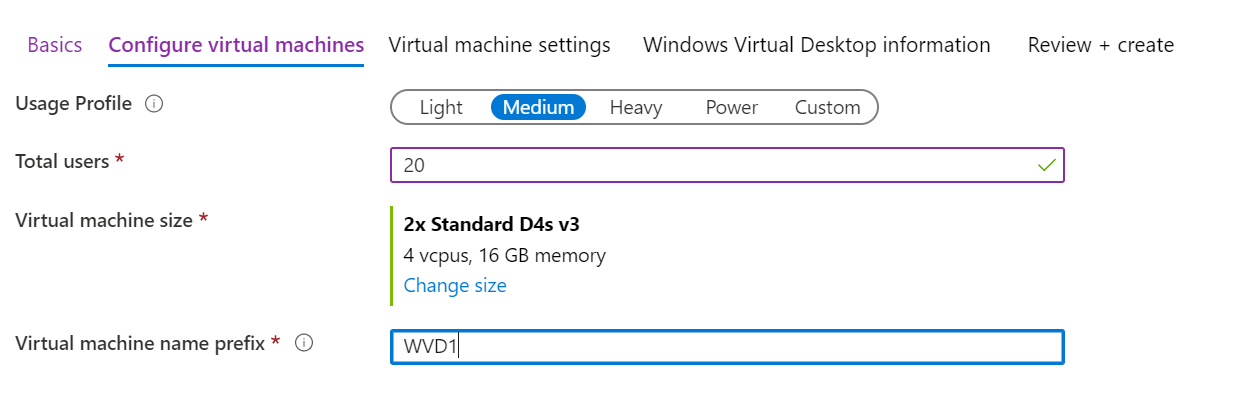
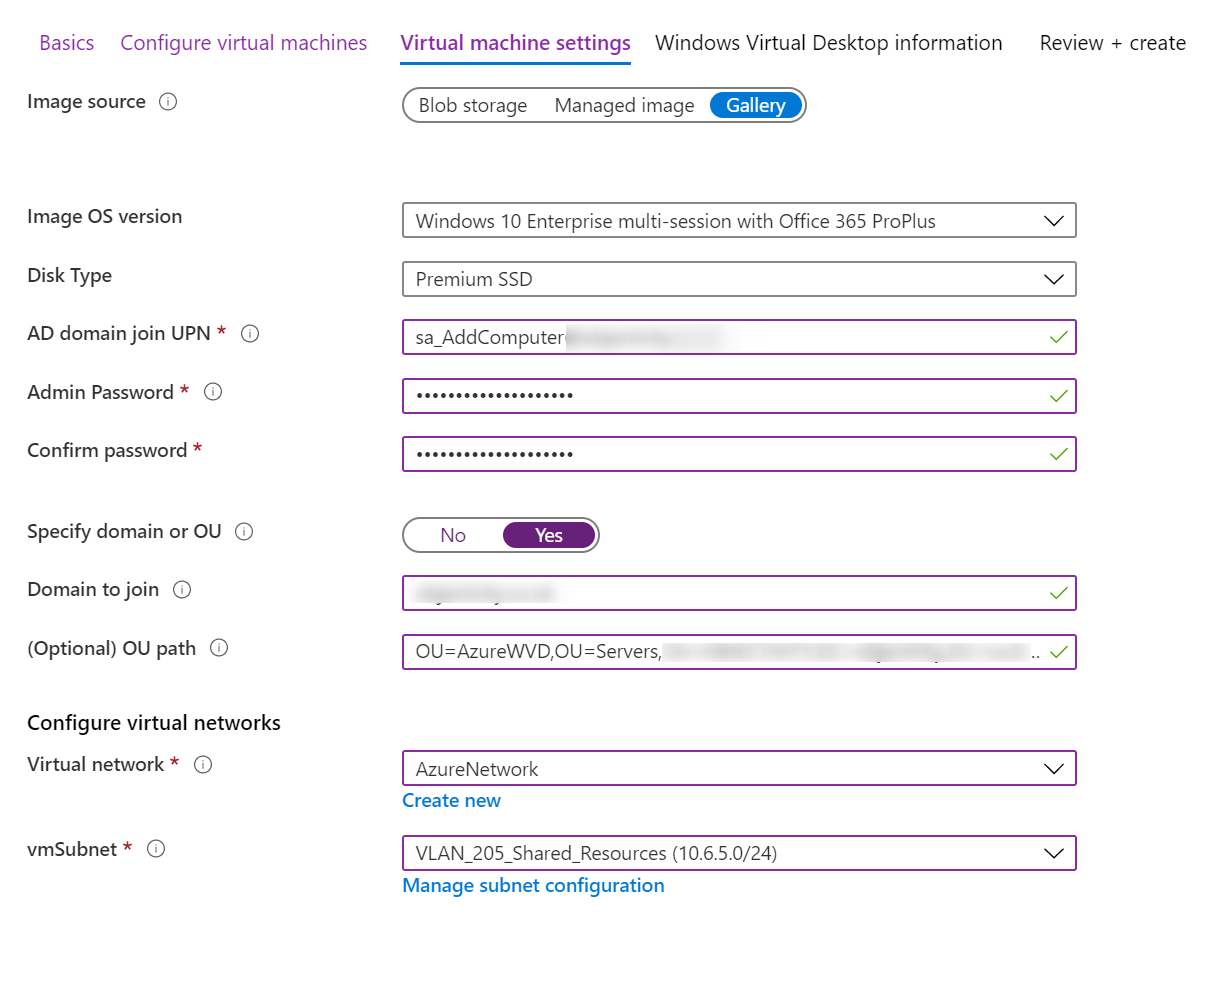
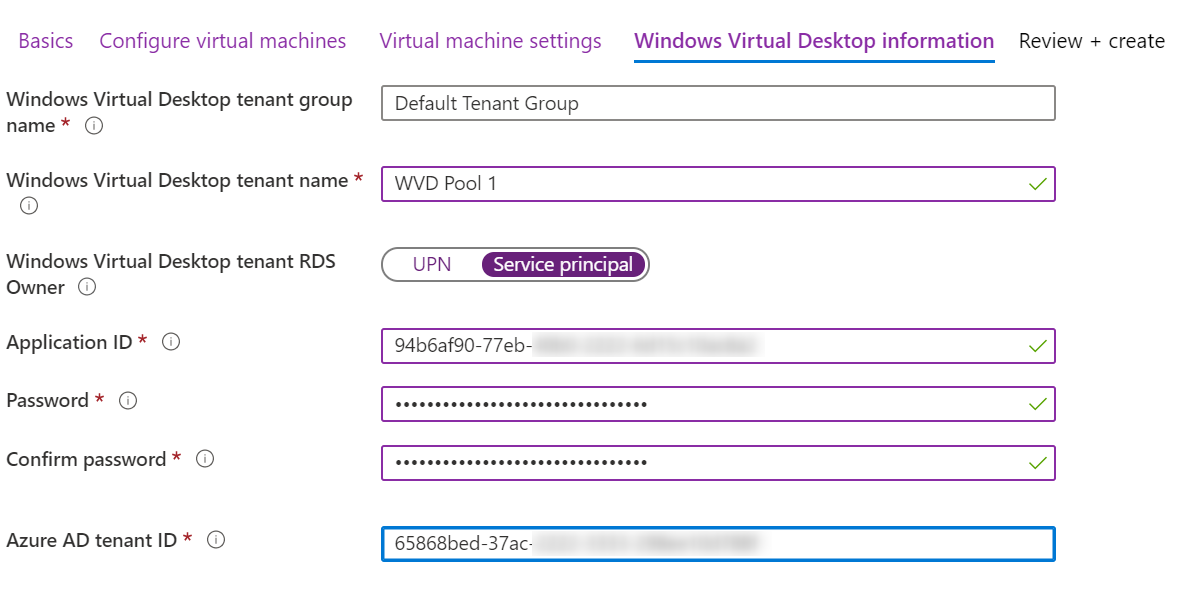
Deploy WVD through Azure marketplace
Now go to Azure Portal, select Create Resource and fill in the information.
Add users to those WVDs
Once the deployment is done we can grant users the access. In my case it’s adding them to:
- AD group that will grant them Windows E5 license
- WVD
Desktop Application Group
$UsersForWVD = @('user1', 'user2','user3')
$TenantName = 'WVD Pool 1'
$HostPoolName = 'WVD1-WE-HostPool'
$Context = Add-RDSAccount -DeploymentUrl https://rdbroker.wvd.microsoft.com
$AzureContext = Connect-AzureAD
$DomainName = 'contoso.com'
$LicenseADGroup = 'Cloud_Windows10Enterprise_E5'

foreach ($user in $UsersForWVD) {
    $UserUPN = '{0}@{1}' -f $user, $Domain
    Add-ADGroupMember -Identity $LicenseADGroup -Members $User
    Add-RdsAppGroupUser -TenantName $TenantName -HostPoolName $HostPoolName -AppGroupName "Desktop Application Group" -UserPrincipalName $UserUPN
}
Guide users on using RemoteApplication
Now we have the easiest part done. Next is guiding how to connect to the service. ![]()
Users can connect to Windows Virtual Desktop:
- using Web Browser
or
- using dedicated application
Using Web Browser
- Go to https://aka.ms/wvdweb
- You will be prompted for your corporate login and password
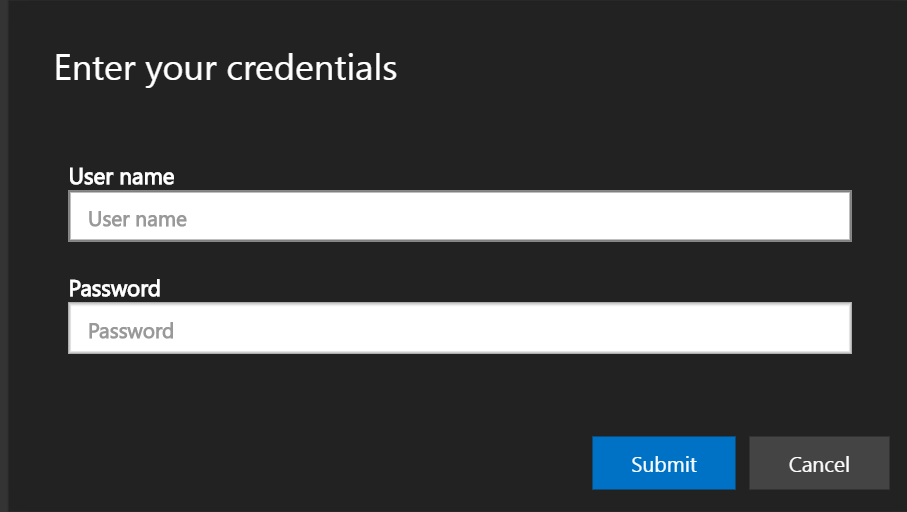
- Click on the ‘Session Desktop’ Icon and select which resources you’d like to use.
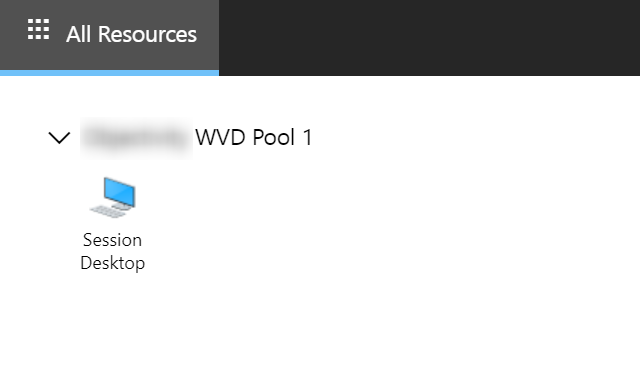

You’ll be prompted for your credentials once again (this time for the VM itself)
Using Remote App
There is a dedicated app for Windows, Android, macOS or iOS
Once you have the application installed, run it, click Subscribe and provide your corporate login:
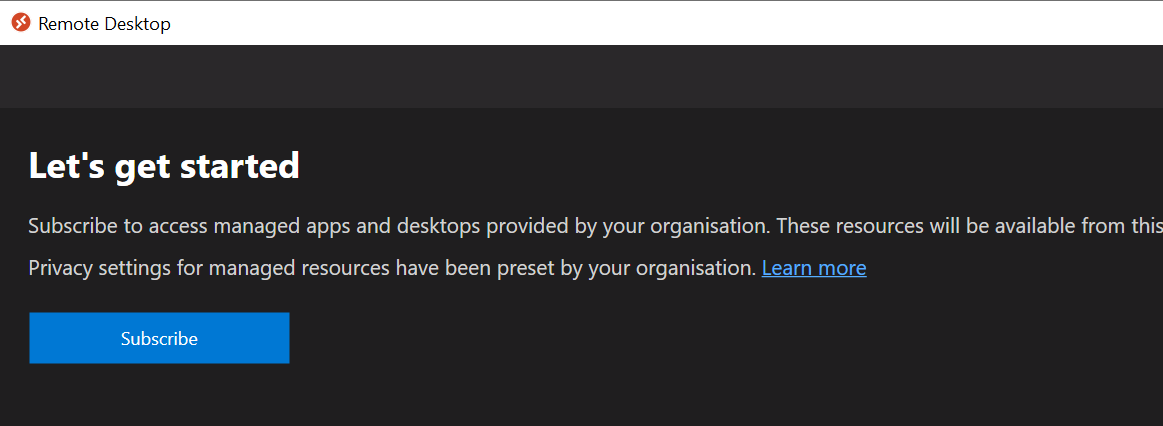
If it won’t find the RDFeed, please provide this URL as a feed: https://rdweb.wvd.microsoft.com
Additional Settings
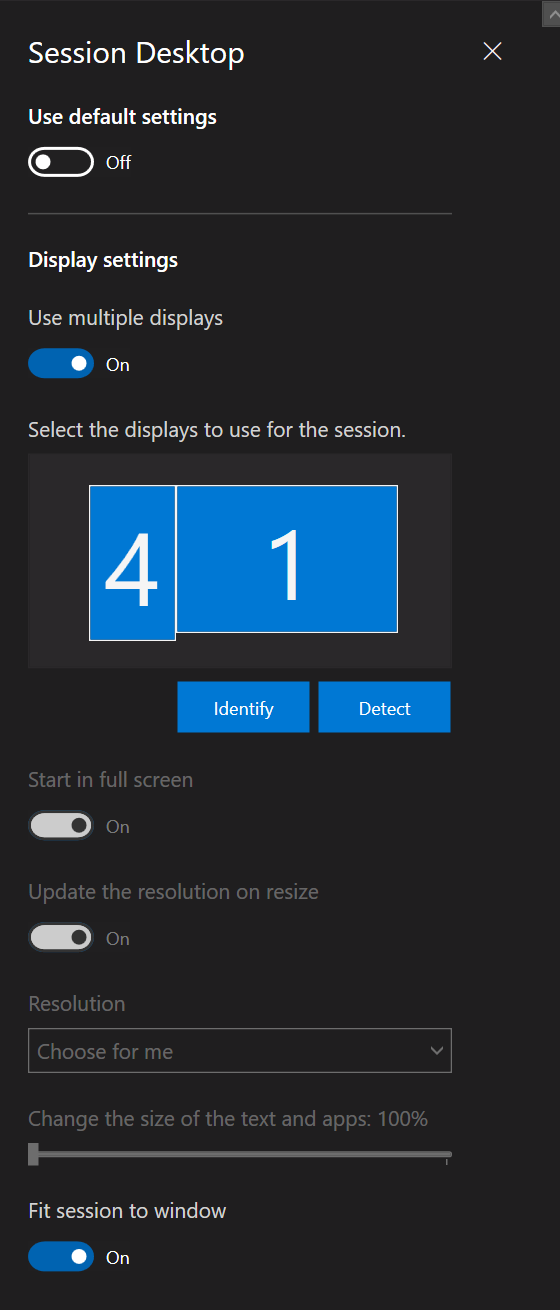
Once you run the application you can adjust the settings - right click on the Session Desktop and select Settings
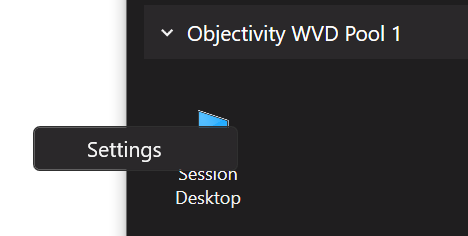
If you unselect Use default settings you can set more options:
Summary
I must admit that overall I’m pretty impressed by this solution.
I’ve set up on-premises RDS farms before - it wasn’t hard.
BUT, if you want to have a solution that is High Available - it’s getting pretty complex. With Windows Virtual Desktop - it’s very easy.
There are still some rough edges. It’s not a single-button-click. Also not all options (compared to on-premises) are available but taking into consideration this is still a new solution - I’m very satisfied.
But, what’s more important - our users have access to secure environment without much issues.
Now, how to monitor the usage? Stay tuned!
Leave a comment