Veeam, Virtual Lab and limitations
To protect our environment we’re using Veeam Availability Suite and it is just GREAT!
It just works
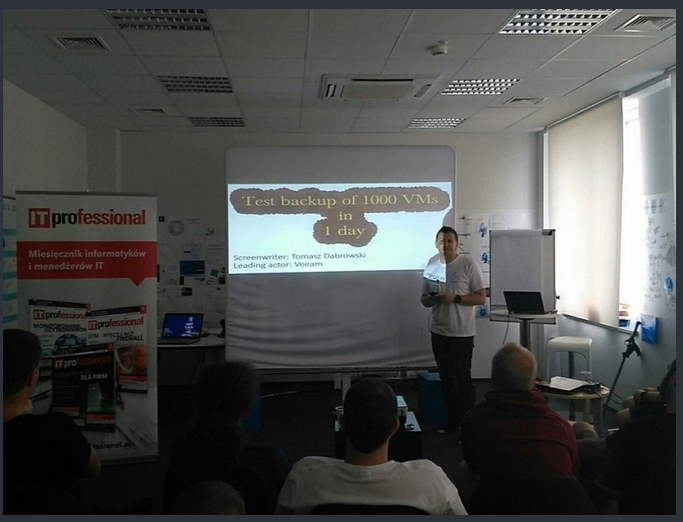
![]() At our 3rd PPoSh Meetup Tomasz Dabrowski (Twitter, Blog) showcased how we protect (meaning TEST our backups)
At our 3rd PPoSh Meetup Tomasz Dabrowski (Twitter, Blog) showcased how we protect (meaning TEST our backups) 1000VMs a day thanks to some PowerShell magic.
The testing is done as a part of SureBackup feature. It grabs latest backup, spins a new VM in isolated environment, runs some checks and reports the status. All good. But imagine this situation:
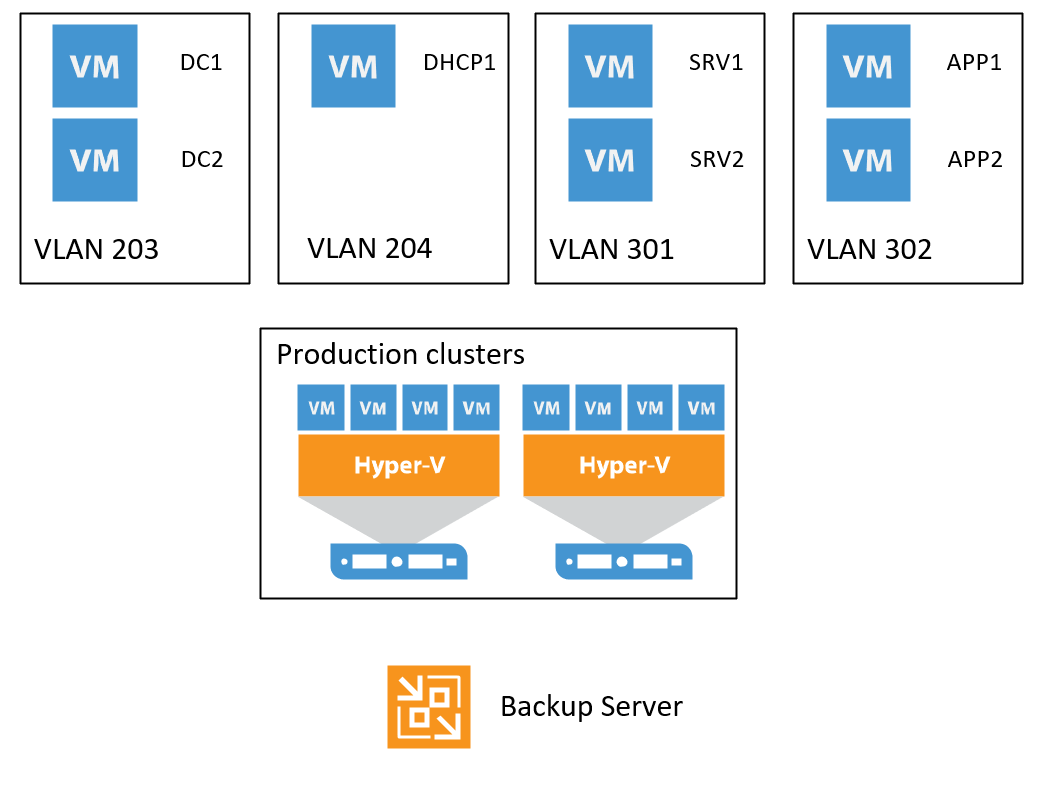
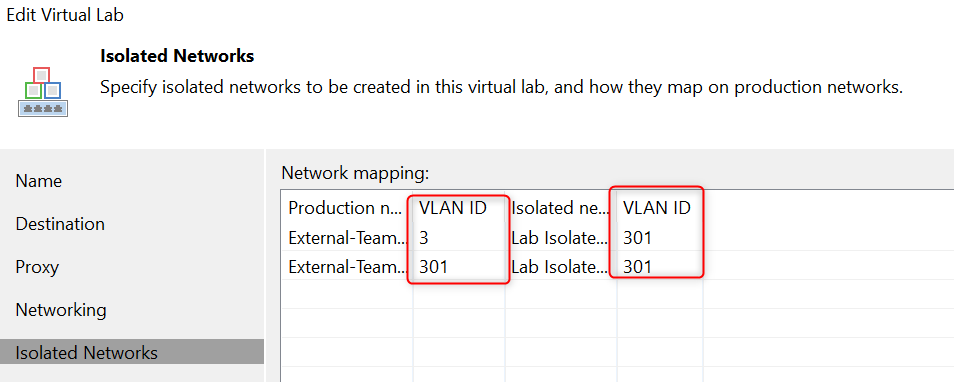
Now, VirtualLab does allow advanced mapping of network but that requires separate virtualSwitch on Hyper-V for EACH vlan. If I try to configure Veeam Isolated network to map two different VLANs for production it sets the same VLAN ID on isolated network:
Because of this I cannot use Veeam Virtual Lab for scenarios like:
- upgrade a service (i.e. Jira - it requires at least 5 VMs from different VLANs and IP subnets)
- test deployement (TeamCity and agents and destination servers - again, a few VLANs)
- controlled damage to a service

I’ve decided to go with a VyOS router. Let’s roll!
Ready! Set! Go!
To start I needed a VM:
| Property | Value |
|---|---|
| Generation | 1 |
| vCPU | 1 |
| Memory | 256MB static |
| HDD | 2GB dynamic |
| Network1 | External |
| Network2 | Private |
Also don’t forget about the ISO of VyOS.
Step-by-step
I will require:
- get the iso
- create VM
- set Network2 adapter for trunking
- install VyOS
- reboot
- configure
Get the ISO
$URLs = @('https://downloads.vyos.io/release/1.1.8/vyos-1.1.8-amd64.iso')
$Date = Get-Date -Format yyyyMMdd_hhmm
$TempFolder = "d:\Temp_$Date"
New-Item -Path $TempFolder -ItemType Directory -Force
$URLs | foreach-object {

    $fileName = Split-Path $_ -Leaf
    $DestinationPath = Join-Path $TempFolder -ChildPath $fileName
    Invoke-WebRequest -Uri $_ -OutFile $DestinationPath
}
Create VM
$VMName = "VyOS-LAB1"
$VyOSISO = $DestinationPath
$ComputerName = 'HyperVTest1' #Hyper-V where we are creating the VM
$Credential = Get-Credential #For the Hyper-V Host
$ExternalSwitch = 'External'
$PrivateSwitch = 'Private'

Invoke-Command -ComputerName $ComputerName -ScriptBlock {
    $VirtualHardDiskPath = (Get-VMHost).VirtualHardDiskPath
    $newVMSplat = @{
        Generation = 1
        Name = $USING:VMName
        NewVHDSizeBytes = 2GB
        NewVHDPath = '{0}\{1}_disk0.vhdx' -f $VirtualHardDiskPath ,$USING:VMName
        MemoryStartupBytes = 256MB
        SwitchName = $USING:ExternalSwitch
    }
    New-VM @newVMSplat
    $setVMSplat = @{
        StaticMemory = $true
        ProcessorCount = 1
        Name = $USING:VMName
    }
    Set-VM @setVMSplat

    Rename-VMNetworkAdapter -VMName $USING:VMName -Name "Network Adapter" -NewName "External"
} -Credential $Credential
Set LAN network adapter for trunking
Invoke-Command -ComputerName $ComputerName -ScriptBlock {
    Add-VMNetworkAdapter -VMName $USING:VMName -Name "Internal" -SwitchName $USING:PrivateSwitch
    Set-VMNetworkAdapterVlan -VMName $USING:VMName -VMNetworkAdapterName "Internal" -Trunk -NativeVlanId 0 -AllowedVlanIdList 1-4094
} -Credential $Credential
Install VyOS
Invoke-Command -ComputerName $ComputerName -ScriptBlock {
    Set-VMDvdDrive -VMName $USING:VMName -Path $USING:VyOSISO
    Start-VM -Name $USING:VMName
} -Credential $Credential
Now the VM should be starting.
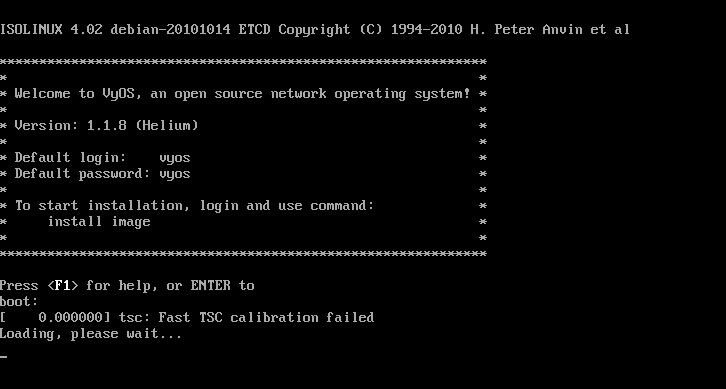
Once it boots login using vyos as login and password. Then install image and follow the on-screen instructions;
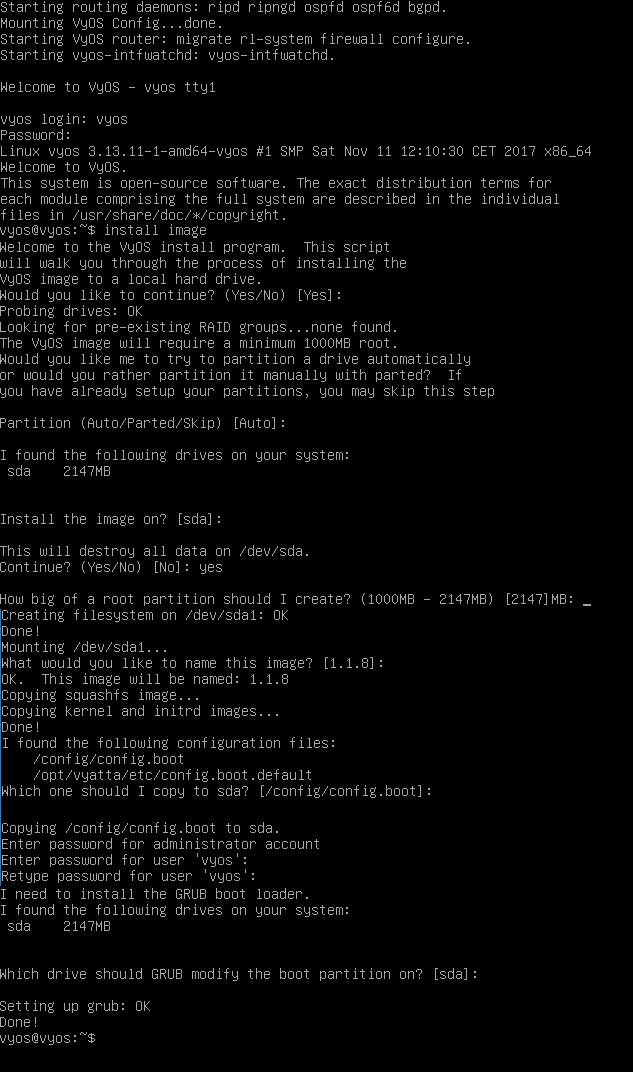
Dismount and reboot
Now dismount ISO and reboot (or else you will be configuring LiveCD and configuration won’t be persistent ![]() )
)
Invoke-Command -ComputerName $ComputerName -ScriptBlock {
    Stop-VM $USING:VMName
    Get-VMDvdDrive -VMName $USING:VMName | Remove-VMDvdDrive
    Start-VM -Name $USING:VMName
} -Credential $Credential
Configure VyoS
Last step is to configure vyOS
A few information before:
- eth0 is our WAN interface with 10.1.1.10/24 IP. This is the IP VyOS will be visible from our enterprise network
- eth1 is our LAN interface with all VLANs
- VLANs will use 192.168.x.0/24 subnets
- DHCP server is in VLAN 203 with IP 192.168.3.20
- NAT is set for all 192.168.x.0/24 subnets
configure
set service ssh port 22

set system host-name VyOS-1
set system domain-name contoso.com
set system time-zone Europe/Warsaw

set interfaces ethernet eth0 address 10.1.1.10/24
set interfaces ethernet eth0 description 'External'

set protocols static route 0.0.0.0/0 next-hop 10.1.1.1 distance '1'

set interfaces ethernet eth1 vif 203 address 192.168.3.1/24
set interfaces ethernet eth1 vif 203 description 'VLAN 203'
set service dhcp‐relay interface eth1.203
set service dhcp‐relay server 192.168.3.20

set interfaces ethernet eth1 vif 204 address 192.168.4.1/24
set interfaces ethernet eth1 vif 204 description 'VLAN 204'
set service dhcp‐relay interface eth1.204

set interfaces ethernet eth1 vif 205 address 192.168.5.1/24
set interfaces ethernet eth1 vif 205 description 'VLAN 205'
set service dhcp‐relay interface eth1.205

###
#MOAR VLANS
###

set nat source rule 100 outbound-interface eth0
set nat source rule 100 source address 192.168.1.0-192.168.255.0
set nat source rule 100 translation address masquerade

commit
save
Summary
And that’s it. Now I have my VirtualLab VM ready. I won’t be able to use as part of Veeam SureBackup for now, but for my 'manual' scenarios it is more than enough!